
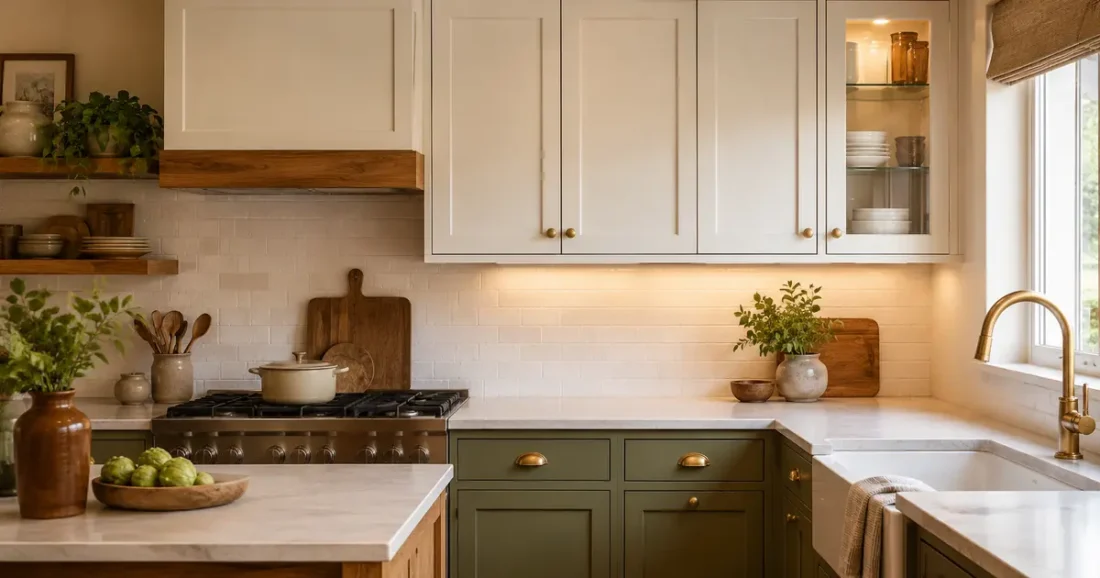
Kitchen cabinets occupy more visual space than almost anything else in the room, so even a small change to their color, hardware, lighting, or surroundings can alter the whole kitchen. The good news is that a polished result does not require custom cabinetry. Existing cabinets can look more intentional when the finishes relate to one another, the display areas are edited, and the everyday items are stored where they actually belong.
Affordable kitchen cabinet styling is less about adding decorations and more about correcting what feels disconnected. A coordinated set of pulls, a better paint plan, warm task lighting, or one carefully arranged glass-front cabinet will usually have more impact than a collection of small accessories. Use the ideas below as a menu: begin with the no-cost changes, then spend only on the upgrade that solves the most visible problem.
Table of Contents
Start With a Cabinet Audit Before You Shop
Stand at the kitchen entrance and identify what your eye notices first. It may be a row of mismatched handles, grease-darkened doors, crowded glass shelves, an awkward gap above the cabinets, or appliances covering most of the counter. Photograph the room from two or three angles. A photo makes inconsistent finishes, crooked hardware, and visual clutter easier to spot than they are during normal daily use.
Next, separate cosmetic problems from structural ones. Loose hinges, sagging shelves, water-swollen panels, peeling laminate, and damaged drawer boxes need repair before styling. Paint and new knobs will not correct a door that no longer closes properly. If the cabinets are sound, clean them thoroughly, tighten hardware, align the doors, and remove everything displayed solely because there was nowhere else to put it. This first pass costs little and gives you a much clearer idea of what the room needs.
Build a Cohesive Kitchen Cabinet Color Story
Choose the cabinet palette from the fixed elements that are difficult or expensive to replace: flooring, countertops, backsplash tile, and major appliances. If the counter has warm cream or brown veining, stark blue-white cabinets may emphasize the difference. A warmer ivory, soft mushroom, muted olive, or restrained clay accent can connect the surfaces more naturally. With cool gray counters, a soft white, smoky blue, or charcoal detail may feel more balanced.
Do not force a trendy color onto cabinets that are in good condition simply because it is popular online. If you want inspiration, review the warmer neutrals and earthy accents in our home decor trends guide, then test a movable sample beside the counter in morning, afternoon, and evening light. In a compact kitchen, controlling contrast and visual weight is especially important; our small-kitchen decorating guide shows how to do that without making the room feel plain.
Upgrade the Hardware Without Replacing the Doors
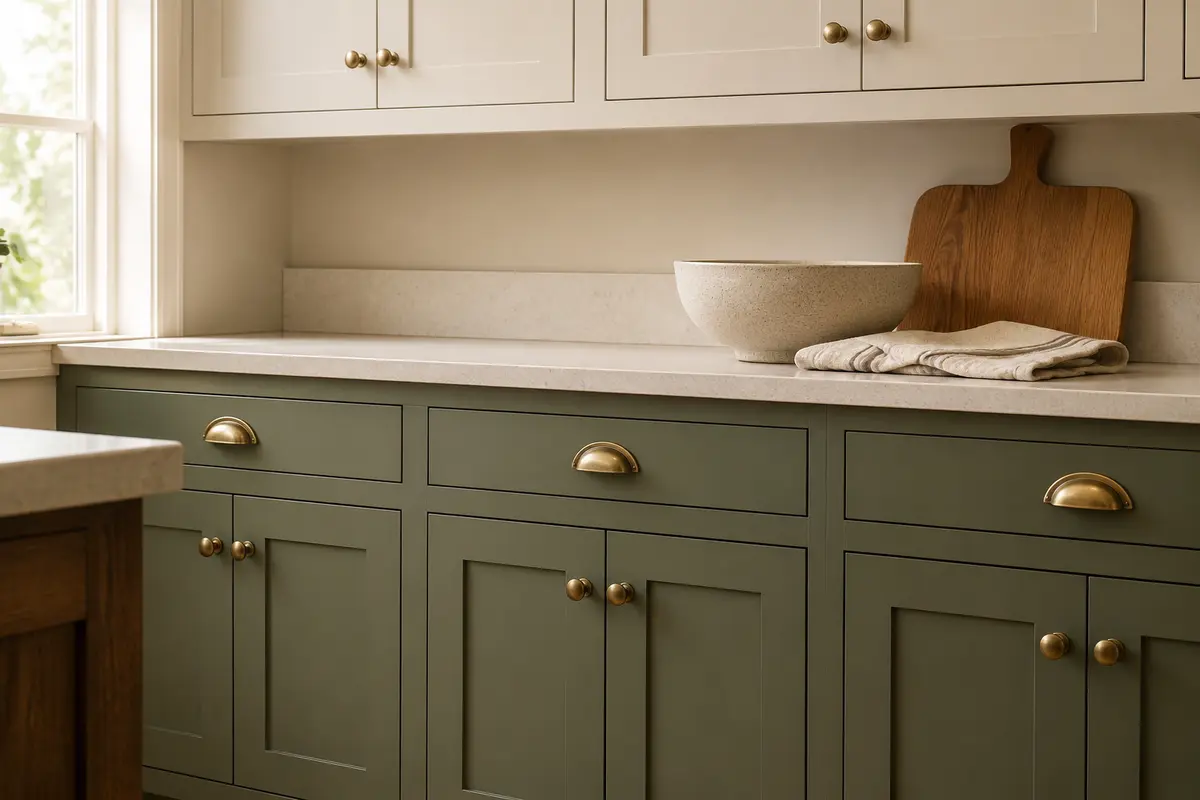
Hardware is one of the quickest cabinet updates because it creates a repeated line across the room. Before ordering anything, remove one existing pull and measure the distance between the screw holes from center to center. Choosing the same hole spacing avoids filling and redrilling every door. If you are switching from a knob to a pull, test the new placement on a cardboard template before making a permanent hole.
You do not need the same hardware shape everywhere. Knobs on doors and pulls on drawers can work beautifully when the finish, weight, and level of detail are consistent. Simple round knobs paired with softly curved cup pulls suit traditional or cottage cabinets; slim bar pulls give flat or Shaker fronts a cleaner contemporary line. Avoid mixing several unrelated metal colors unless another permanent element, such as the faucet or lighting, provides a reason for the combination.
Placement matters as much as style. The manufacturer Amerock recommends centering knobs horizontally on a door stile and using consistent placement across the cabinetry; its cabinet hardware placement guidance also discusses wider drawers. Check that a pull is comfortable for every person who regularly uses the kitchen, especially on heavy drawers. Tighten gently and use washers when the hardware instructions call for them so the finish is not damaged.
Paint Cabinets Only When the Surface Is Worth Saving
Paint can produce the largest visual change, but it is not a shortcut. It works best on stable wood, wood veneer, suitable composite materials, or previously painted surfaces that can accept the correct primer and finish. Peeling thermofoil, crumbling particleboard, active water damage, or an unknown slick laminate may need a different repair plan. Test the process on the back of a removable door before committing to the whole kitchen.
Preparation determines whether a budget paint job looks polished. Label every door and hinge, remove the hardware, clean away cooking grease, repair dents, and dull a glossy surface as recommended for its material. Benjamin Moore’s kitchen cabinet painting guide recommends working on flat, removed doors, cleaning and drying the surfaces, sanding glossy finishes so primer can grip, applying a suitable primer, and allowing adequate drying time between steps.
Style Glass-Front Cabinets for Daily Life
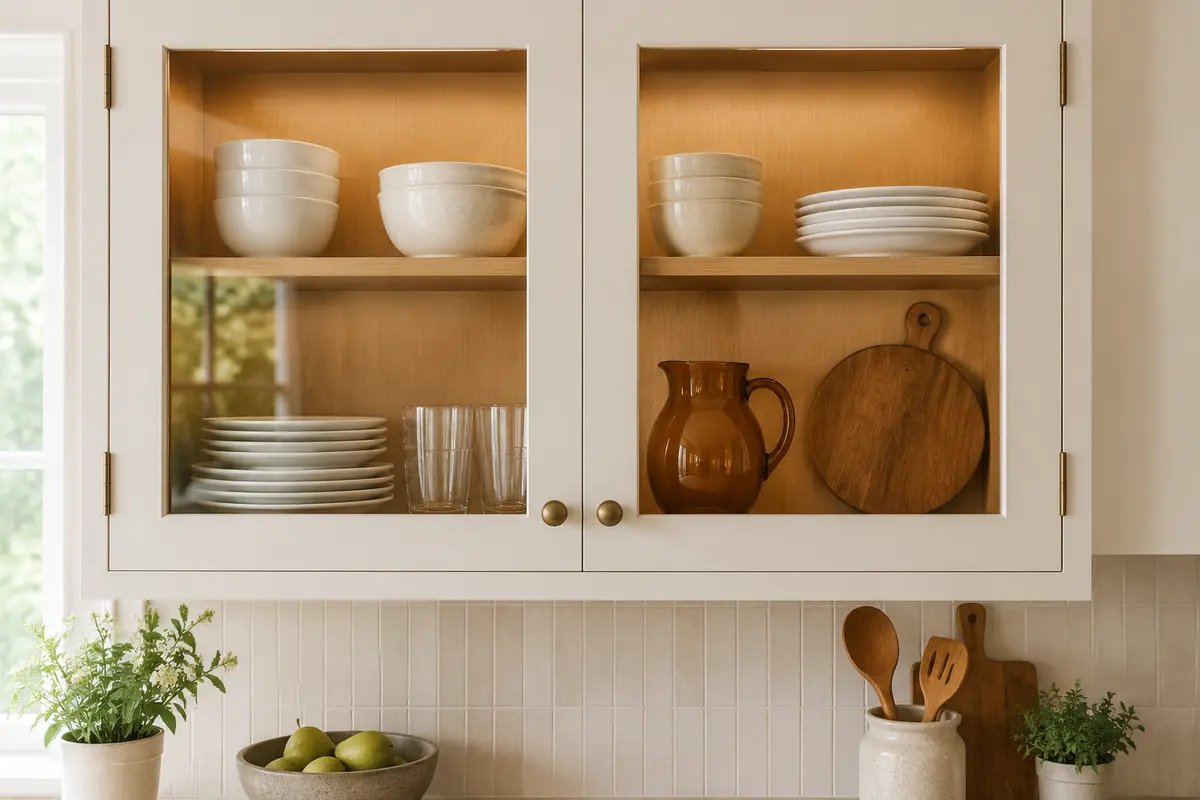
A glass-front cabinet should still function as storage. Place frequently used plates, bowls, and glasses on the lowest accessible shelf, then reserve higher shelves for serving pieces or decorative items used less often. This makes unloading the dishwasher easier and prevents the display from being destroyed every time someone needs a mug.
Limit the visible palette to two or three related tones. White dishes, clear glass, warm wood, and one accent color are easy to maintain because replacements do not have to match perfectly. Build the display with a few larger shapes rather than many small objects: a stack of plates, a group of bowls, a pitcher, and a serving board create enough variation. Leave some of the cabinet back visible so each group can be read clearly.
If the contents still look busy, line the cabinet back with removable wallpaper, fabric-covered board, or paint in a quiet tone that relates to the room. A darker backing can make pale dishes stand out, while a light backing reduces the weight of dark glassware. Test removable materials in an inconspicuous area and keep paper products away from heat, moisture, and exposed wiring.
Create One Open-Display Moment
You do not need to remove every upper door to get the character of open shelving. One narrow cabinet, a small shelf beside the range, or the end of an existing cabinet run can become a controlled display zone. This approach works best when the items are genuinely used: coffee cups near the machine, everyday bowls near the prep area, or cookbooks away from splashes and steam.
If you remove a door, store it flat and protect the hinges and screws so the change can be reversed. Paint or line the interior only after confirming the surface is suitable. In a rental, do not drill, paint, or remove doors without checking the lease and obtaining any required permission. A freestanding plate rack, countertop shelf, or tray can create a similar layered look without altering the cabinetry.
Use the Space Above Cabinets With Restraint
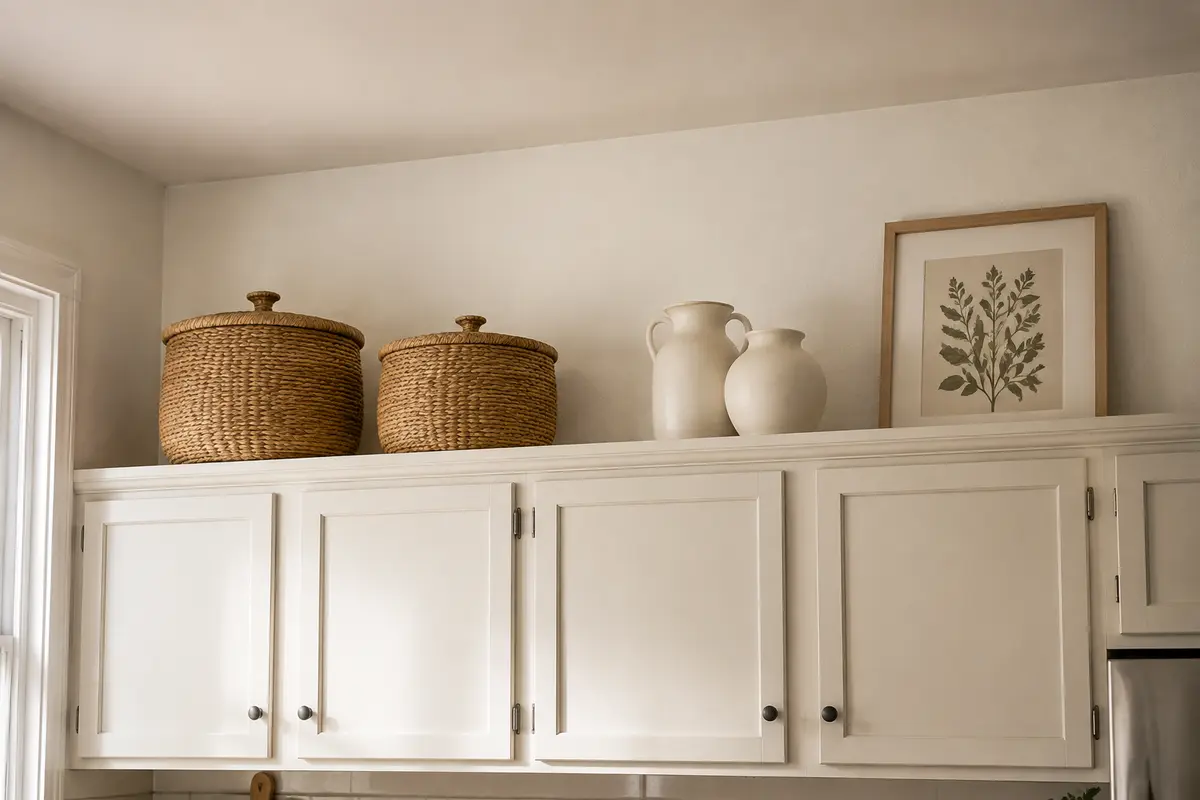
The gap between upper cabinets and the ceiling does not always need decoration. Leaving it empty is often the cleanest choice in a small kitchen or a room with detailed tile, patterned counters, and several visible appliances. If the gap feels unfinished, use a few larger objects rather than a continuous row of small decor.
Try two or three generous groupings: lidded woven baskets, a pair of ceramic vessels, or one framed piece leaning securely against the wall. Baskets can hold lightweight seasonal linens or rarely used serving pieces, but they should be easy to lift and far from heat, grease, vents, and exposed electrical components. Measure cabinet depth before buying containers so they sit fully supported.
Add Under-Cabinet Light and Clear the Work Surface
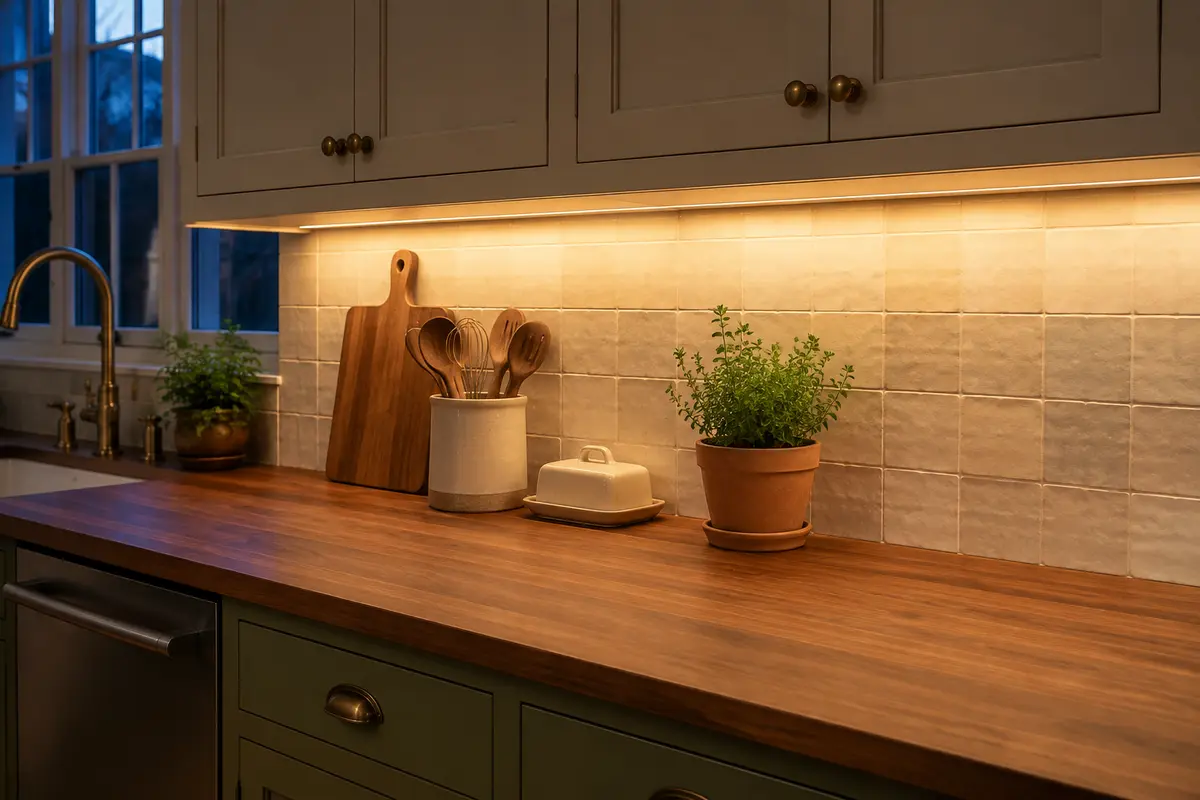
Under-cabinet lighting improves both the cabinets and the worktop. It reveals the backsplash texture, creates depth under upper cabinets, and puts light where food preparation happens. A U.S. Department of Energy remodeling guide notes that under-cabinet lighting places light on the work surface while reducing the shadows created when a person stands beneath ceiling lighting.
Choose a continuous-looking light source with concealed wiring rather than a visible dotted strip. Warm white light around 2700K to 3000K usually complements wood, cream, brass, and warm paint; a more neutral light may suit cool white or gray finishes. Match the color appearance of fixtures visible together, and select products approved for the intended location. Hardwired installation should be handled according to local requirements and by a qualified professional where necessary.
Once the worktop is brighter, edit what sits beneath the cabinets. Keep daily tools in one crock, lean one or two boards together, and use a tray for small bottles that otherwise scatter. Leave a clear section beside the sink and range for actual work. A useful kitchen looks more refined than a heavily decorated one because the empty space communicates order.
Make Interior Organization Part of the Styling
Cabinet styling fails when the interiors are so crowded that the doors and counters cannot stay orderly. Group items by the task they support: baking supplies near the mixer, breakfast dishes near the table, food-storage containers near the cleanup zone, and daily cookware close to the range. Put the most frequently used pieces between knee and eye height when the cabinet layout allows.
Use risers, shelf dividers, turntables, or simple bins only after measuring the shelf and identifying a real problem. A storage product that wastes vertical space or blocks the hinge is not an improvement. Matching containers are optional; a limited color palette and clear labels inside solid cabinets are enough. In a compact kitchen, keep daily-use items close to the work zone they support and move rarely used pieces to less accessible shelves. For a fuller system, see our small kitchen organization guide.
Do not store heavy appliances above shoulder height or stack fragile dishes where they are difficult to control. Decorative baskets should never hide a load that is unsafe to lift. Function is not separate from appearance: doors that close easily, shelves that stay calm, and counters that can be cleared in a minute are what allow the styling to last.
Choose the Best Upgrade for Your Budget
Spend according to visual impact and condition, not by dividing the budget equally. These ranges are planning examples rather than price guarantees; costs vary by cabinet count, location, material, and whether professional labor is needed.
| Budget level | Best priorities | What to postpone |
|---|---|---|
| No-spend refresh | Deep clean, align doors, edit displays, regroup cabinet contents, clear work surfaces | New decorative accessories |
| About $25–$75 | Replacement knobs, shelf liner, paint samples, one tray or riser, warm plug-in task light | Mixing several hardware styles |
| About $75–$200 | Coordinated pulls for a small kitchen, quality primer and paint for a limited section, better under-cabinet lighting | Painting sound cabinets without testing |
| About $200–$500 | Hardware for a larger cabinet run, supplies for a full DIY paint refresh, selected glass inserts or professional electrical work | Replacing boxes that remain structurally sound |
Start with one repeated improvement. Consistent hardware across twenty doors will normally change the room more than four unrelated accessories. If the cabinets are visually heavy, color may be the priority. If the finishes already work but the room feels flat, lighting and a cleaner counter arrangement may be enough.
Follow a Practical Weekend Styling Order
A clear sequence prevents you from buying decor for a layout that still needs correction:
- Photograph the whole cabinet run and list structural repairs separately.
- Empty one zone at a time, clean it, and return only useful items.
- Tighten hinges and align doors before evaluating the finish.
- Choose a color and metal plan based on the countertop, backsplash, and appliances.
- Test one hardware sample on a door and one pull on a drawer.
- Style glass or open storage with everyday pieces before buying decor.
- Improve task lighting and then edit the newly illuminated counter.
- Wait several days, photograph the kitchen again, and add only what is still missing.
If painting is part of the project, treat it as a separate phase rather than squeezing it into a casual afternoon. Preparation, drying, and curing require space and patience. Hardware, organization, and display styling can be completed while you plan the larger work.
Common Cabinet Styling Mistakes to Avoid
The first mistake is trying to fix every surface at once. New pulls, painted doors, patterned liner, open shelves, baskets, and several accent colors can compete until the cabinets look busier than before. Choose one dominant change and let the remaining details support it.
Another problem is treating every empty area as display space. Cabinet tops, glass doors, open shelves, and counters do not all need collections. Select one or two places for personality and keep the rest functional. Avoid tiny objects above high cabinets, where they read as clutter from below and are difficult to clean.
Finally, do not ignore scale and comfort. A delicate knob may look attractive but feel awkward on a heavy pantry door; an oversized pull may crowd a narrow stile. A shelf arrangement that photographs beautifully but makes daily dishes hard to reach will not stay styled. The best result supports cooking, cleanup, and storage first.
Frequently Asked Questions
What is the cheapest way to update kitchen cabinets?
Start by cleaning the doors, tightening hinges, aligning gaps, and reducing counter clutter. If the finish is sound, replacing only the most visible knobs or painting a small island or lower cabinet section can create a noticeable change without updating every surface.
Can I mix knobs and pulls on kitchen cabinets?
Yes. Knobs on doors and pulls on drawers often look coordinated when they share the same finish, visual weight, and level of detail. Test the combination on one door and one drawer before ordering the full set.
How do I style glass-front cabinets without clutter?
Use a limited color palette, arrange everyday dishes in a few larger groups, and leave part of the cabinet back visible. Keep frequently used pieces on the lowest accessible shelf and decorative items higher.
Should I decorate the space above my kitchen cabinets?
Only if it improves the room. In a small or visually detailed kitchen, leaving the gap empty may look cleaner. When decorating, choose a few large, lightweight groupings and leave generous open space rather than lining the entire cabinet top.
Can renters make kitchen cabinets look better?
Renters can deep-clean and align doors, organize visible storage, use trays and freestanding risers, and add approved removable liner or plug-in lighting. Obtain permission before painting, drilling new holes, removing doors, or changing hardwired fixtures.
Is under-cabinet lighting worth adding in a budget kitchen?
It can be a high-impact upgrade because it improves the work surface and adds depth beneath upper cabinets. Choose an even, concealed light with an appropriate color temperature and follow product and electrical-safety instructions.
A Better-Looking Kitchen Begins With One Repeated Choice
Affordable kitchen cabinet styling works when the room becomes calmer, more useful, and more consistent. Clean and align the cabinets first, then choose the repeated detail that will make the greatest difference: coordinated hardware, a tested paint color, an edited glass-front display, restrained cabinet-top storage, or warm task lighting. Complete that improvement well before moving to the next. The cabinets will feel more polished not because they imitate a luxury showroom, but because every visible choice supports the way the kitchen is used.

2 Comments